

Injection Molding vs 3D Printing vs CNC Machining: Which Process Fits Your Product Stage?
Compare CNC machining vs injection molding vs 3D printing to choose the right process for prototyping, pilot production, and manufacturing.
Compare CNC machining vs injection molding vs 3D printing to choose the right process for prototyping, pilot production, and manufacturing.
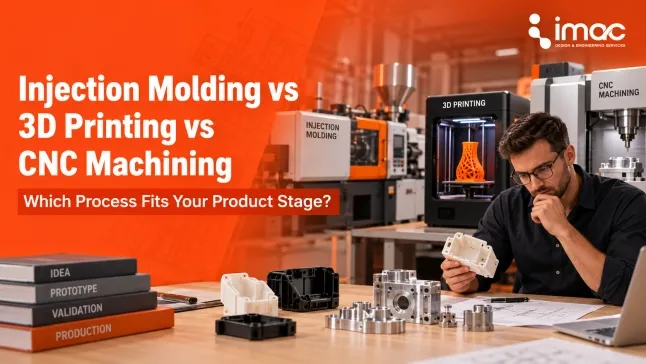
Choosing between CNC machining, injection molding, and 3D printing is not simply a question of which manufacturing process is “better.”
The right choice depends on what your product needs to prove right now.
An early prototype may need to confirm size, shape, or ergonomics. A functional prototype may need production-grade materials and tight fits. A product approaching manufacturing has a different problem: repeatability, tooling investment, unit economics, and production capacity.
That is why the same product can move through more than one manufacturing process before reaching the market.
Use 3D printing for concept models and early proof-of-concept work. Move to CNC machining once you need production-representative materials for functional testing. Use prototype or bridge tooling to validate manufacturability at low volume. Commit to full injection molding tooling only after the design is frozen and volume justifies the upfront cost.
The fundamental difference between these manufacturing processes is how each process creates the part.
CNC machining starts with solid material and removes material using cutting tools.
3D printing, also called additive manufacturing, builds a part from digital geometry layer by layer.
Injection molding forms a part by injecting molten material into a manufactured mold, allowing the same geometry to be reproduced repeatedly.
These differences affect almost every manufacturing decision that follows.
3D printing is an additive manufacturing process. The machine adds material only where the digital model requires it.
CNC machining is a subtractive manufacturing process. A machine removes material from a solid block or billet until the required geometry remains.
Injection molding is a forming or molding process. The manufacturer first creates tooling, then uses that tooling to form repeated parts.
That difference affects how each process handles geometry. CNC tools need physical access to the features they machine. 3D printing can create shapes that would be difficult to cut conventionally. Injection-molded parts must be designed so they can fill, cool, and release from the mold reliably, which brings in considerations such as draft angles, wall thickness, parting lines, and undercuts.
3D printing usually requires little or no dedicated tooling, so teams can change the CAD model and produce another iteration quickly. This makes it especially useful while the design is still evolving.
CNC machining also avoids production molds, but every part still requires programming, setup, machine time, tool access, and material removal. More complex geometry can increase machining time and cost.
Injection molding has the opposite cost structure. The mold requires a larger upfront investment and adds lead time before production begins. Once the tooling is validated, however, the same mold can produce parts repeatedly, which can reduce the cost per part as volume increases.
This is why process selection should consider both the cost and speed of producing the first acceptable part and the economics of producing every part after it.
| Factor | CNC Machining | Injection Molding | 3D Printing |
| Process | Subtractive | Forming/molding | Additive |
| Main advantage | Precision and material choice | Repeatable production at scale | Fast iteration and geometric freedom |
| Main limitation | Machining time and tool-access constraints | Tooling investment and costly late changes | Process-dependent material, tolerance and finish limitations |
| Tooling requirement | Fixtures/workholding may be needed | Dedicated mold required | Usually no dedicated production tooling |
| Design changes | Relatively flexible | More expensive after tooling | Highly flexible |
| Best fit | Functional parts, precision prototypes, end-use parts | Stable production plastic parts | Concepts, prototypes, complex or customized parts |
| Materials | Wide range of metals and plastics | Broad range of moldable polymers and other specialized materials | Process-specific polymers, resins, metals and other materials |
| Tight tolerances | Strong capability | Good repeatability once the process is controlled | Depends heavily on printing technology |
| Complex geometry | Limited by tool access | Limited by moldability | Usually strongest geometric freedom |
| Surface finish | High-quality machined surfaces possible | Repeatable molded finish | Often requires post-processing for cosmetic surfaces |
| Cost pattern | Machine time remains significant per part | High upfront tooling, lower unit cost at scale | Low setup cost, but production time repeats for each build |
The table provides a useful starting point, but it should not become a fixed rule. Production volume alone does not determine the right process. Geometry, materials, quality requirements, design stability, and what the part must validate can change the decision significantly.
Not sure whether CNC machining, 3D printing, or injection molding fits your product right now?
A better way to compare CNC machining vs injection molding vs 3D printing is to ask what evidence the next physical build needs to provide.
During the concept stage, teams normally need answers quickly.
Does the enclosure fit the intended components? Does the mechanism move? Is the product comfortable to hold? Is there enough room for the PCB, motor, battery, sensor, or connector?
3D printing often fits this stage because teams can revise CAD geometry without investing in hard tooling.
The prototype does not always need production-level material properties at this point. Its purpose may simply be to expose design problems before more engineering time and money go into the product.
Once you need to test how a part performs under load, heat, repeated use, or precise assembly conditions, CNC machining often becomes more useful.
It lets you test parts made from engineering plastics and metals with tighter dimensional control. This makes it suitable for critical fits, threaded features, seals, mechanical interfaces, and structural testing.
Industrial 3D printing processes such as SLS and MJF can also support functional validation, especially when complex geometry matters.
The choice should depend on what the test needs to prove, not simply whether CNC is considered more advanced than 3D printing.
This is where CNC machining, industrial 3D printing, and prototype or bridge tooling can all make sense.
CNC machining works well for low-volume production of precision parts. 3D printing can support short runs or complex components. Prototype molds can produce molded parts before committing to full production tooling.
Pilot runs also reveal issues that a few prototypes may miss, such as assembly variation, inspection requirements, repeatability, and supplier consistency.
Once the geometry, materials, critical dimensions, and assembly requirements are stable, injection molding becomes easier to justify for suitable plastic components.
Production tooling requires more upfront investment, but it can deliver repeatable parts efficiently as production volume grows.
CNC machining may still remain the final manufacturing process for metal or precision components. 3D printing can also remain in production for customized, complex, or lower-volume parts.
The manufacturing process should follow the product requirements, not a fixed development sequence.
This also maps naturally to iMAC's seven-stage process: Design Research → Innovation & IP Strategy → Product Design → Engineering → Prototyping → Tooling → Manufacturing.
Product stage narrows the options, but engineering requirements often make the final decision.
CNC machining can use the same grade of metal or engineering plastic planned for a machined production component, making it useful for functional testing.
If the final component will be injection molded, however, a 3D-printed version may not behave the same way even if the material name looks similar. Printing method, build orientation, layer bonding, resin formulation, and post-processing can all affect performance.
Injection-molded samples become more important when the team needs to evaluate properties influenced by the molding process itself.
That is why teams should separate geometry validation from material and process validation.
CNC machining generally offers the strongest dimensional control of the three, which makes it useful for bearing locations, sealing surfaces, alignment features, holes, and other critical interfaces.
Injection molding can also produce highly repeatable dimensions once the mold and process are properly controlled, but designers must account for shrinkage, cooling, warpage, and tooling accuracy.
3D-printing accuracy varies more by technology, material, orientation, and part geometry. Critical holes or mating surfaces may sometimes need secondary machining.
The key is to apply tight tolerances only where the product actually needs them.
3D printing offers the most freedom for internal channels, lattice structures, organic forms, and geometry that cutting tools cannot easily reach.
CNC machining is limited by tool access, cutter geometry, and the number of setups required.
Injection molding introduces a different set of constraints. Draft angles, wall thickness, undercuts, parting lines, gates, and ejection all influence whether the part can be molded efficiently.
So the “most complex” part is not always the same for every process.
Injection molding can reproduce consistent cosmetic textures and finishes directly from the mold.
CNC machining can produce clean, controlled surfaces and can be followed by polishing, anodizing, coating, or other finishing operations.
3D-printed surfaces depend heavily on the printing technology. Layer lines, support marks, and stair-stepping may require sanding, coating, machining, or other post-processing when appearance matters.
The finish should ultimately follow the function. A sealing surface, bearing fit, and cosmetic enclosure do not need the same surface specification.
Need production-representative materials and tighter dimensional control for your next build?
Medical device development makes process selection more sensitive because later testing may need to represent the intended finished device, not just its shape.
A 3D-printed prototype can still work well for ergonomics, assembly studies, clinician feedback, and early mechanical testing. As development progresses, however, the material and manufacturing process may need to become more representative of production.
FDA biocompatibility guidance considers the final finished device, including materials, manufacturing methods, processing, sterilization, and potential manufacturing residuals. That means teams should think about the production process before they reach final validation.
Yes, potentially.
Moving from a 3D-printed prototype to an injection-molded production part can change the material formulation, surface characteristics, processing conditions, additives, and manufacturing residuals.
That does not mean every process change automatically requires testing to start again. The team needs to determine whether the test article adequately represents the final finished device and document any relevant differences.
Material traceability, process control, and documentation therefore become especially important in medical device development. An ISO 13485:2016 quality management system supports this structured approach to medical device design and production.
The exact verification, validation, biocompatibility, and regulatory requirements still depend on the device and its intended use.
Switch processes when the next development question requires different evidence, not simply because the project has reached a certain number of units.
Move toward CNC machining when the printed prototype has already answered the basic form and fit questions, and the next test needs:
✓ tighter dimensional control
✓ production-representative engineering materials
✓ critical mechanical interfaces
✓ threads or precision features
✓ more controlled functional surfaces
✓ more representative mechanical testing
If another printed prototype can still answer the engineering question reliably, there may be no reason to switch yet.
Before investing in production tooling, the team should have confidence in:
✓ tighter final or released CAD geometry
✓ tighter material selection
✓ critical tolerances
✓ assembly interfaces
✓ functional performance
✓ DFM requirements
✓ inspection requirements
✓ expected production demand
The key point is design maturity. If geometry and functional requirements are still changing, tooling can lock those uncertainties into an expensive physical asset.
Prototype or bridge tooling can make sense when the design is reasonably mature but the team still needs molded parts before committing to full production tooling.
It can help validate molded-part behavior, assembly, appearance, dimensional consistency, or a limited pilot run using a process closer to final production.
But prototype tooling is not automatically necessary. Its value depends on what remains uncertain and whether producing molded parts at this stage will answer an important development question.
There is also no universal volume where injection molding suddenly becomes the better economic choice. Tool complexity, part geometry, material, cycle time, cavitation, finishing, and expected lifetime volume can shift the break-even point significantly.
Yes. Many products use different manufacturing processes for different components.
An electronics product, for example, might use an injection-molded plastic housing, a CNC-machined aluminum heat sink or structural bracket, and 3D-printed jigs or fixtures during assembly.
The processes can also appear at different stages of development. A team might 3D print an enclosure for early testing, CNC machine critical components for functional validation, and later injection mold the production enclosure.
The goal is not to force the entire product into one manufacturing process. Choose the process that best fits each component's function, material, geometry, volume, and production requirements.
Choose the best manufacturing route for each component and each stage of product development.
Common mistakes include:
✓ Choosing based only on production volume: Quantity matters, but so do design maturity, material, geometry, tolerances, and what the part needs to prove.
✓ Starting production tooling too early: If the design is still changing, mold modifications or replacement tooling can add significant cost.
✓ Assuming a successful prototype is production-ready: A prototype may validate form and function without representing mold shrinkage, production repeatability, or long-term material behavior.
✓ Sticking with the process the team already knows: The right process can change as the product moves through development.
✓ Comparing only the quoted cost per part: Tooling, fixtures, programming, finishing, inspection, secondary operations, and design-change costs also affect the total manufacturing cost.
Start with one question:
What does the next physical build need to prove?
Then consider:
✓ How stable is the design?
✓ How many parts do you need now?
✓ Do you need production-representative material?
✓ Which dimensions are function-critical?
✓ How complex is the geometry?
✓ What surface finish does the part require?
✓ Are major design changes still likely?
✓ Is expected demand reliable enough to justify tooling?
If you are still testing form, fit, layout, or ergonomics, 3D printing often provides the fastest route to another iteration.
If functional testing requires tighter tolerances, engineering materials, or critical interfaces, CNC machining may provide better evidence.
If the plastic design is stable and expected production volume can justify tooling, plastic injection molding becomes worth evaluating.
And for many products, the right answer is a combination of processes rather than one process from concept to production.
CNC machining, injection molding, and 3D printing are not simply competing ways to make the same part. Each process solves a different set of product development and manufacturing problems.
The right choice depends on what your product needs to prove at its current stage, how stable the design is, what materials and tolerances it requires, and how production demand is expected to grow.
A product may start with 3D printing, move to CNC machining for functional validation, and later use injection molding for production. Another product may keep CNC machining or 3D printing as its final manufacturing process.
At iMAC Engineering, we work across the product development cycle, from engineering and prototyping through tooling and manufacturing, helping teams select processes based on what the product actually needs at each stage.
If you are deciding how to move your product from prototype to production, talk to iMAC Engineering about your manufacturing strategy.

 Download Brochure


