How To Build a Product Prototype - 7 Steps
A complete guide to building a product prototype in 7 steps. Understand prototype types, benefits, tools, and testing methods to validate ideas before production.
A complete guide to building a product prototype in 7 steps. Understand prototype types, benefits, tools, and testing methods to validate ideas before production.
How to build a product prototype is one of the most searched questions by first-time founders and honestly, it should be.
Today, investors and stakeholders don’t buy ideas; they buy proof and the answer that says what problem you are solving. Creating a prototype allows you to demonstrate functionality while utilizing user-centered design to solve specific market pain points.
A prototype is not a final product. It's a decision-making approach. It tells you what works, what doesn't, and what needs to change before you spend real money on tooling and manufacturing.
To understand this process, let’s look at the foundational definition of a product prototype and why it serves as the bridge to your final product!
✓ Prototyping is a functional bridge between a concept and a manufacturable product, primarily used to save development time and cost.
✓ The product prototype development process requires a transition from 2D sketches to 3D CAD models and physical builds.
✓ Integrating Design for Manufacturability (DFM) early prevents costly re-engineering during mass production.
✓ Iterative prototype testing methods ensure the final product meets user needs and safety standards.
A product prototype is a working model of your product built before full-scale manufacturing begins. It acts as the bridge between a theoretical design and a physical object.
Depending on where you are in development, a prototype can be a rough foam model, a 3D printed shell, a machined part, or a fully functional pre-production unit. The type you build depends on what question you're trying to answer.
The prototype creation process typically moves from low-fidelity (form and size checks) to high-fidelity (functional, materials-accurate, production-ready). Each stage reduces a different kind of risk - aesthetic, structural, functional, or manufacturing-related.
A prototype exists for one reason: to reduce risk before it becomes expensive.
Its purpose shifts depending on where you are in the product design process. Early on, it validates the core concept: Does this mechanism actually move the way we calculated? Later, it tests user-centred design: Does the grip feel natural after 10 minutes of use?
What a prototype is not is a preview of the finished product. Treating it that way is one of the most common mistakes teams make. A prototype is a working question. The answer it gives you determines what happens next in your product development workflow!
The primary reason it matters is the ability to save development time and cost by identifying errors early. It is significantly cheaper to modify a 3D-printed part than it is to retool a multi-thousand-dollar injection mold once production has already started.
Beyond cost, prototyping matters because it forces decisions. Teams that skip prototyping often discover late in development that their product is difficult to assemble, expensive to manufacture at scale, or doesn't meet regulatory requirements. Those aren't design problems, they are process problems. A structured step to create a product prototype approach resolves them before they compound.
According to design engineers, prototype testing methods reveal usability issues that 80% of users miss in concept reviews, simply because they weren't holding the product. It also matters for your manufacturer. Providing a physical reference eliminates confusion, ensuring they quote the right process and materials the first time. Ultimately, it matters because a tested prototype is the only reliable foundation for a successful product launch!
Have a design but not sure how to prototype it? Our team has built prototypes across medical devices, consumer electronics, and more.
1. Uncovers Design Flaws When They Are Easy to Fix
The most obvious benefit, but worth understanding deeply. A dimensional error caught in CAD costs nothing but time to fix. The same error caught after steel has been cut for an injection mold can cost $10,000 or more in rework and delays. Prototype testing methods like fit checks and tolerance stacking reveal if parts interface correctly.
2. Enables Genuine User Feedback
Stakeholders and clients react differently to a render versus a real object. With a prototype they can interact with objects. You observe how they hold it, where they struggle, and what confuses them. This is where user-centred design works in its actual practice. Users will tell you things they never would from looking at a screen - like a button being positioned where their thumb naturally rests, or a surface texture feeling cheaper than expected.
3. Accelerates Investor and Stakeholder Buy-In
Investors evaluate hundreds of decks. A functional prototype signals that you have moved beyond the idea phase and possess the technical capability to execute. It answers their questions: Can this team build things? Do they understand manufacturing? A prototype paired with clear Design for Manufacturability (DFM) analysis shows you are preparing to produce.
4. Saves Development Time and Cost
Rapid prototyping directly impacts your bottom line by compressing iteration cycles. Instead of waiting weeks for tooling to test a concept, you hold a 3D-printed part in days. You test multiple versions simultaneously. You validate the Minimum Viable Product (MVP) definition with real hardware before production tooling. Time saved in development is money retained in your budget.
5. Improves Manufacturer Communication and Quoting
Sending a 2D drawing to a manufacturer leaves the chances of interpretation. Sending a physical prototype or even the high-fidelity CAD data used to create it eliminates confusion. Manufacturers can see the wall thickness, the undercuts, and the surface finish requirements. This leads to more accurate quotes and fewer errors or no errors during production. It ensures the product prototype development process aligns seamlessly with the manufacturing phase.
6. Tests Functionality Under Real-World Conditions
A functional prototype allows you to test thermal performance, mechanical stress, and material behavior in real environments. For medical device clients, this means regulatory testing. For consumer products, it means drop tests and water resistance validation. You learn what breaks, what wears out, and what works before your customers do.
7. Builds Internal Team Alignment
Engineering, marketing, and sales often have different priorities. Engineering wants manufacturability. Marketing wants aesthetics. Sales wants features they can demonstrate. A prototype becomes the single source of truth that aligns these teams. Everyone moves forward looking at the same object.
Not all prototypes look alike. Some are barely held together with tape; others are indistinguishable from the final product. Choosing the right type depends on what question you are trying to answer.
1. Low, Mid and High-Fidelity Prototypes
Fidelity refers to how closely the prototype resembles the final product in appearance, materials, and function.
Low-Fidelity Prototypes
These are quick, rough, and cheap. Think cardboard models, foam shapes, or paper sketches taped together. Their purpose is to validate basic scale, ergonomics, and layout before any serious engineering begins. A low-fidelity prototype answers: Does the overall shape fit in a user's hand? Is the button reachable? They take hours to make and minutes to throw away. This is where you want to fail fast.
Mid-Fidelity Prototypes
These prototypes look more refined but still lack production materials or full functionality. They are often 3D printed in basic resins or plastics to test form and fit. A mid-fidelity prototype answers: Do the parts assemble correctly? Does the mechanism move as intended? They help catch interference issues and validate the general product design process without the cost of machining metal or molding plastic.
High-Fidelity Prototypes
These are functionally and visually nearly identical to the final product. They are made using production-intent materials - CNC-machined aluminium, injection-molded ABS, or silicone overmolds. High-fidelity prototypes are used for final user testing, regulatory submissions, and investor demos. They answer: Does the product survive a drop test? Does the seal keep water out? They are expensive and take time, but they provide the highest confidence before tooling.
2. Digital vs. Physical Prototypes
This distinction is often misunderstood. Both are essential, but they serve different purposes in the prototype creation process.
Digital Prototypes (Virtual)
These exist entirely within software. CAD models, simulations, and renderings are digital prototypes. They allow you to test physics, thermal loads, and assembly sequences without touching raw material. Digital prototypes are where you perform Design for Manufacturability (DFM) analysis checking draft angles, wall thickness, and tooling feasibility. They are fast to modify and cost nothing to "rebuild." The limitation? You cannot hold them. You cannot feel the texture or test the ergonomics in the real world.
Physical Prototypes (Tangible)
These are real objects you can touch, hold, and break. They reveal what simulations miss—how light reflects off the surface, how the weight feels in hand, how the mechanism sounds when it clicks. Physical prototypes are essential for user-centred design because humans interact with objects, not screens. The trade-off is time and material cost. Every physical iteration takes days.
3. MVP vs. Prototype
This is one of the most confused distinctions in hardware development. They are not the same thing.
Prototype
A prototype is an internal tool used to learn. It is part of your development process. You build prototypes to test assumptions, fail safely, and iterate toward a better design. A prototype might never see a customer. It might be ugly. It might only test one specific function like whether a hinge rotates 180 degrees. The audience for a prototype is engineers, designers, and testers.
MVP (Minimum Viable Product)
The minimum viable product (MVP) is the external starting line. It is the simplest version of your product that delivers core value to early customers and generates revenue or feedback. An MVP must be reliable enough to ship, safe enough to use, and complete enough to solve the user's core problem. It is not unfinished; it is intentionally focused. The audience for an MVP is customers.
Not sure which fidelity or format fits your stage?
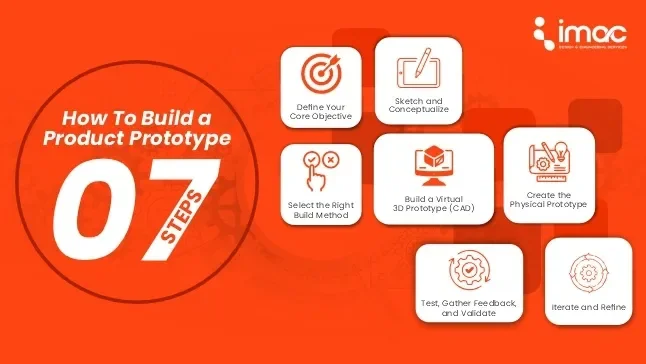
These are the steps to create a product prototype:
Step 1: Define Your Core Objective
Before you draw a line, ask: What do I want to learn from this prototype?
Are you testing the look (aesthetics), the feel (ergonomics), or the function (mechanics)? If you are testing waterproofing, you don't need a perfect color match. Defining the goal prevents scope creep and keeps the rapid prototyping benefits intact.
Step 2: Sketch and Conceptualize
Put the idea on paper. This is not about artistic talent; it's about visualizing scale and user flow. Once the rough sketches are approved by the internal team, we move to precise 2D technical drawings that define dimensions and key features.
Step 3: Build a Virtual 3D Prototype (CAD)
This is where the engineering begins. Using CAD software (like SolidWorks), we create a detailed digital model. This step is crucial for the product development workflow because it allows for virtual stress tests, heat simulations, and fit checks. We can perform Design for Manufacturability (DFM) analysis here to ensure the part can actually be produced via injection molding or CNC machining later.
Step 4: Select the Right Build Method
Not all prototypes are built the same. Based on your objective, you might need:
✓ Proof-of-Concept (POC): A rough model to test a specific technical hypothesis.
✓ Visual Prototype: High-fidelity models for photos and investor presentations.
✓ Functional Prototype: Built with real materials and moving parts to test performance.
Step 5: Create the Physical Prototype
Using the 3D CAD data, we manufacture the part. This often involves additive manufacturing (3D printing/SLA) for complex geometries or subtractive processes (CNC machining) for parts requiring tight tolerances and specific material properties like aluminum or ABS . Holding the part reveals nuances the screen never could.
Step 6: Test, Gather Feedback, and Validate
Put the prototype in the user's hand. Observe how they interact with it. Does the button placement feel natural? Is it balanced correctly? We document everything. This is the "Measure" phase of the Build-Measure-Learn cycle. Compare the results against the objectives you set in Step 1.
Step 7: Iterate and Refine
Prototyping is rarely a one-and-done event. Based on feedback, you return to the CAD model to make adjustments. You might go through several cycles of prototyping, each one getting closer to the final product, before you finalize the design for manufacturing.
✓ For early-stage visual and functional mockups, 3D printing (FDM and SLA) is the most accessible and fastest option.
✓ For parts requiring near-production material properties, CNC machining and vacuum casting are more appropriate
✓ For digital form-factor exploration and UI/UX validation on connected devices, CAD-based virtual simulation tools like SolidWorks, Fusion 360, and ANSYS allow structural and thermal analysis before any physical build.
At iMAC Engineering, our in-house setup supports SLA, FDM, vacuum casting, and CNC-based iterative prototyping — so we're not dependent on a single method across the prototype creation process.
Perfectionism in the First Round: Your first prototype should fail. If it works perfectly, you didn't push the boundaries enough. The goal is to learn, not to be perfect.
Skipping the "Why": Building a prototype just "to see what it looks like" is expensive. Every prototype should start with a clearly defined hypothesis. If you don’t know what you’re testing, you’re just spending money.
Choosing Aesthetics Over Physics: A beautiful prototype that melts under heat or breaks under stress is useless. Focus on functional integrity first.
Ignoring DFM: Designing a part that cannot be molded or machined is a classic mistake. Ensure your design is aligned with real-world manufacturing constraints from day one.
Your idea deserves a prototype that actually works. We handle the full product prototype development process.
To turn an idea into a prototype, begin by creating detailed sketches, followed by a professional 3D CAD model. From there, use professional 3d prototyping services like 3D printing to create a physical version for testing and refinement.
Yes, generally you need at least a visual or functional prototype as it significantly increases your credibility. It proves the technical viability of your idea, demonstrates the product design process, and shows investors you have mitigated the primary risks of production and functionality.
At iMAC Engineering, we have built prototypes for medical devices, consumer electronics, industrial equipment, IoT devices, and more. We work across the full product development workflow from concept and CAD to physical prototyping, DFM analysis, tooling, and contract manufacturing.
Our in-house prototyping capabilities include SLA, FDM, vacuum casting, and CNC-based methods. We build a model that tells you exactly what you need to know before you commit to production.
We are ISO 9001:2015 certified with 7+ years in product design and development. 30+ global partners. 100+ projects completed! Talk to our team today.